

A Behind-the-Scenes Look at My Jewellery Making Workshops
- HazelsJewelleryShop

- 1 day ago
- 2 min read
If you’ve ever wondered what it’s like to spend a day making your own jewellery, I wanted to give you a little peek behind the scenes
My workshops are designed to be relaxed, creative, and beginner-friendly a chance to step away from the everyday and create something personal with your own hands.
Whether you come on your own or with friends, the day is all about slowing down, learning something new, and enjoying the process 🤍

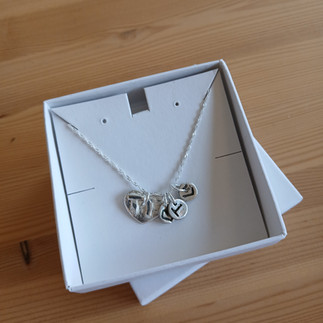


Fine silver jewellery handmade by workshop attendees
What to Expect on the Day
Workshops usually run from 9:30am to 4:00pm (although we often finish a little earlier depending on the group), giving you plenty of time to enjoy each step without feeling rushed. Each step is demonstarted before you have a go yourself and I am there to give you as much or as little support as you need!
We also take a relaxed hour for lunch, along with plenty of breaks throughout the day because creativity flows best when you feel comfortable and at ease 🌿
Step 1: Introduction to Silver Clay
We start the day with an introduction to silver clay — a fascinating material made from recycled silver particles, water, and a natural binder.
It might look like clay to begin with… but by the end of the day, it will become solid fine silver (99.9%)
Step 2: Designing Your Piece
Next, you’ll plan what you’d like to make, either a pair of earrings or a necklace.
You’ll have the chance to: choose your cutters & explore different textures
This is where your creativity really begins to come to life
Step 3: Shaping & Texturing the Clay
You’ll then roll out your silver clay, add texture, and cut out your design.
This part is very hands-on and one of the most enjoyable stages, seeing your ideas take shape in front of you
Step 4: Refining Your Piece
Once your piece has dried, you’ll refine and smooth it, getting it ready for firing.
This step is all about the details and making sure your piece is exactly how you want it
Step 5: The Magic Moment — Firing
This is where the magic really happens
Your piece is fired, burning away the binder and leaving behind pure silver.
Seeing that transformation for the first time is always a special moment
Step 6: Polishing & Finishing
After firing, you’ll polish your piece to bring out its shine, and you can choose to add a patina for a more vintage, detailed finish.
Step 7: Final Touches
Finally, you’ll choose your chain or earring hooks, completing your piece so it’s ready to wear or gift.
And just like that… you’ve created your own piece of silver jewellery!


Making their own jewellery - each of these ladies had never used silver clay before! But all went home with a piece they made!
More Than Just a Workshop
While you’ll leave with a beautiful piece of jewellery, the day is about so much more than that.
It’s about:
✨ trying something new
✨ reconnecting with your creativity
✨ spending time in a relaxed, welcoming space
✨ and creating something meaningful with your own hands
Ready to Join a Workshop?
If this sounds like something you’d love to experience, I’d love to have you join me


Comments